
Home Canning is a wonderful way to fill your pantry, but a few common mistakes can turn all your hard work into unsafe jars of spoiled and wasted food. In this article, we’ll look at the top canning mistakes people make, and how to avoid them for safe, successfully home canned foods every time.
The smell of simmering jam, the bright crunch of pickles, the cozy satisfaction of neatly lined jars on your pantry shelf… there’s little that beats it. But even experienced canners can make mistakes that lead to incredible disappointment.
In this guide, I’ll walk through the top 15 canning mistakes people make and how to avoid them. From skipping crucial safety steps, to taking shortcuts that can ruin your results, I’ll cover everything you need to know so that you can can with confidence.
Whether you’re brand new to home canning or just brushing up on your skills, when you understand the “why” behind each step, you’ll not only protect your hard work but also ensure your family enjoys safe and wholesome, home canned food all year long.
Watch Me Discuss This List in the Video Below
Mistake #1: Not Inspecting Your Jars
First things first, before you even begin canning, the first thing you should do is inspect the jars you are going to can with.
Look for any cracks, even the tiniest ones can be a problem. Run your finger around the rim of the jar, feeling for any flaws. Using damaged or defective jars can compromise your canning success and safety.
Risk of breakage
The heat and pressure during processing put stress on the glass. Any small crack or chip can cause the jar to shatter, potentially ruining your food and creating a dangerous mess.
Seal failure
Chips along the rim of the jar can prevent the lid from sealing properly. This can lead to spoiled or unsafe food.
Best practice: Always inspect jars carefully before use. If you see any cracks, chips, or scratches, don’t use it for canning. Always be sure to use undamaged jars to ensure safe, shelf-stable home canned goods. I do this when I wash the jars, lids and equipment before every canning session.

Mistake #2: Not Following the Right Canning Method (Water Bath vs. Pressure Canning)
Using the right canning method for your food is absolutely essential for safe home food preservation. The method you choose depends on the acidity of the food you’re canning and using the wrong one can make your food unsafe to eat.
High-acid foods can be safely water bath canned.
Foods like most fruits, pickles, jams, jellies, and tomato products are high in acid (pH below 4.6). These foods can be safely processed in a hot water bath or steam canner at 212°F.
Low-acid Foods Must Be Pressure Canned
Foods like meats, vegetables, beans, and soups are low in acid (pH above 4.6). These can harbor Clostridium botulinum, the bacteria that causes botulism. Pressure canning reaches 240–250°F, hot enough to kill botulism spores, which live in low-acid, anaerobic (oxygen-free) environments.
On the other hand, pressure canning delicate, high-acid foods can overcook them and ruin their texture or flavor.
NOTE: There is a way to process low acid foods in a hot water bath canner, however it requires the canner to be at a non-stop, rolling boil for hours and hours, while maintaining the proper water level. If the water boils down and evaporates, and you add additional water causing the boiling to stop, the processing time must start all over again. This is incredibly difficult to do, and because of that is not considered safe. Please don’t try. It’s not worth it.
Botulism Risk Is Real
Botulism produces potent toxins in low-acid, anaerobic environments. It is odorless, colorless, can be life-threatening and you have no way of knowing if it lives in your kitchen environment,
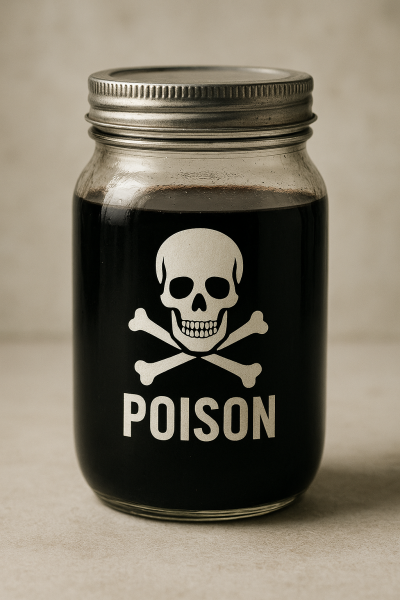
While yes, it is rare, it is not a risk I would be willing to take when it comes to my family’s health.
Best Practice: The right canning method isn’t about preference; it is about safety. Always use pressure canning for low-acid foods and hot water bath (or steam canner) canning for high-acid foods to keep your home canned goods safe, shelf-stable, and delicious.
Mistake #3: Not Following Tested Canning Recipes
Tweaking ingredients, changing quantities, or using old, unverified recipes when canning is dangerous because canning relies on precise chemical and physical processes to prevent botulism and other foodborne illnesses. Here’s a detailed breakdown:
Acid Balance Is Critical
Changing ingredients (such as adding extra vegetables or dairy) can lower the acidity and make a recipe unsafe for the original processing method or processing time. As stated previously, acidity plays a key role in whether a food can be processed in a hot water bath or steam canner, or if they must be processed in a pressure canner.
Processing Time Depends on Quantity and Size
Canning recipes are carefully tested based on jar size, food density, and liquid amount. This is why when you can something like sweet potatoes, you can pack the jars with cubed potatoes, but you don’t mash or puree them.
Increasing or decreasing quantities, or using larger/smaller jars than the recipe specifies, can prevent proper heat penetration, leaving bacteria alive.
This is why so-called “dry canning” is very dangerous. It is a method that I see popularized in “rebel canning” groups.
Canning cubed potatoes without water may give you a nice potato texture, but the liquid in the jars conducts heat. With dry potatoes, there’s no liquid, therefore the proper temperature to kill botulism spores is never reached.
Old or Unverified Recipes May Be Unsafe
Food science is something that is continually studied and research provides new information over time. It is no different with canning.
Your great-grandma’s old canning recipes may not actually be safe as they don’t account for modern food safety standards or proper acidity levels. Yes, Grandma may have done it that way, and maybe no one got sick…but is that a risk you want to take? In my opinion, when you know better, you do better.
Don’t risk it.
Temperature Precision Matters
Pressure and boiling water temperatures must reach a specific threshold for a precise duration.
Tweaking ingredients or quantities can change how the heat distributes through the jar, again risking under processing.
You want the foods in your pantry, that you spent hours of your time and energy canning – maybe even growing from seed – to be a benefit. To provide healthy, wholesome foods that will nourish your family.
Best Practice: Always use tested, trusted canning recipes from reputable sources (National Center for Home Food Preservation, Ball Blue Book, etc. for example). Never improvise with ingredients, quantities, or processing times unless you fully understand the food science behind it.

Mistake #4: Ignoring the Headspace Guidance
Headspace is one of the most important details in canning — it’s the gap between the top of your food/liquid and the rim of the jar. It might seem like a minor thing, but it has a huge impact on food safety, sealing, and quality.
Allows for Expansion During Processing
When jars are heated in a water bath, steam canner or pressure canner, the food and liquid expand.
Too little headspace and the contents inside the jars can bubble up and overflow during processing, which can cause messy jars, and prevent the lids from properly sealing.
Proper headspace gives the food in the jars room to expand safely and keep it from touching the lids.
Ensures a Proper Vacuum Seal
The headspace in the jar helps create a vacuum as jars cool, because the heat will force air out of the jar while it is processing. Then as the jar cools, that space contracts and pulls the lid down tight. That is what causes that beautiful “Ping!” sound of success.
Too little headspace and the vacuum may not form, then the lid may not seal.
Too much headspace and the jar may not create enough suction, then you risk spoilage.
Prevents Spoilage
Correct headspace ensures the right amount of air is left in the jar.
If you have too much air it increases the risk of mold, discoloration, or bacterial growth.
If you have too little air, it can cause the contents to overflow or under-process, making the food unsafe.
Maintains Texture and Appearance
Proper headspace prevents foods from overcooking or becoming mushy.
Not to mention the jars will look beautiful and the food appetizing. This is important not only for your own family (remember we eat with our eyes first) but also if you’re giving them as gifts or storing long-term. I personally love to gift people home canned jellies, jams and other things.
Best Practice: Follow the recipe’s exact headspace measurement (usually ¼ inch for jams, ½ inch for pickles, and 1 inch for pressure-canned foods). Use a ruler or headspace tool to check before sealing.

Mistake #5: Not Removing Air Bubbles
When you’re canning at home, removing air bubbles is a small step that makes a big difference. Those little pockets of trapped air can cause all sorts of problems — from uneven heating inside the jar to failed seals once your jars cool.
If the air isn’t released, your headspace can change, causing food or liquid to seep out during processing. Even worse, air pockets can keep your food from reaching a safe temperature, putting your hard work — and your family’s safety — at risk.
By simply running a bubble wand, a plastic knife or even a chop stick gently along the inside of the jar before sealing, you help ensure even heat distribution, a strong vacuum seal, and beautifully preserved food that lasts on the shelf. It’s one of those tiny steps that makes all the difference in safe, successful canning.
Best Practice: After filling your canning jars, gently run a bubble remover tool down into the jar, jiggling a little to work out any bubbles. Add additional liquid/contents to restore the headspace if need be, because air pockets take up space and your headspace may have changed.

Mistake #6: Failing to Wipe Jar Rims
When canning, never skip wiping down your jar rims.
Even a tiny bit of food or syrup on the rim can keep your lids from sealing properly. That means failed seals, which means spoiled food.
Wiping the rims ensures a smooth surface for a tight, airtight seal and safe, shelf-stable food every time.
Best Practice: Before adding your lids, always use a clean, damp cloth dipped in white vinegar (especially for meats or other greasy foods) to wipe each rim.

Mistake #7: Reusing Lids
Using new lids every time you can food is essential for safety and a reliable seal. Most canning lids are designed for one-time use. The sealing compound softens and molds to the jar rim during processing, creating a perfect vacuum seal as the jar cools. Once that compound has been used, it is a bit degraded and probably won’t properly form the same tight seal again.
If you reuse old lids, you risk seal failures, air leaks, and spoilage, even if everything else was done correctly. Reused lids may also have dents or warping that prevent them from sealing at all.
There are lids that are specifically made to be reused, such as the Tattlers reusable brand of canning lids, or the glass lids of a Weck jar. But most canning lids that are commonly used are designed to be single use.
By always starting with brand-new lids, you ensure a strong vacuum seal, safe preservation, and peace of mind that your hard work won’t go to waste.
Mistake #8: Incorrect Processing Time or Pressure
Processing time is one of the most important parts of safe home canning. It is what makes your food truly preserved and safe to eat.
The processing time ensures that the heat has enough time to kill harmful bacteria, molds, and enzymes that could cause spoilage or foodborne illness (like botulism). It also allows the food to reach the right temperature all the way through the jar.
If jars are under-processed, microorganisms could survive, leading to unsafe food or jars that spoil on the shelf, which as I previously stated, completely undermines your whole reason for canning wholesome, delicious foods for your family.
On the other hand, over-processing can cause food to lose quality, and become too soft, dark, or mushy.
Following the processing time from a tested and reliable recipe ensures that your food is both safe and delicious, with the right texture and shelf life.
Elevation or Altitude Adjustments
The elevation of where you live (or are canning) plays a role with how you will process your foods. As elevation increases, air pressure decreases, which means water boils at a lower temperature.
For example, at sea level water boils at 212°F, but at 3,000 feet it boils closer to 206°F.
The lower boiling point means your jars won’t get as hot during processing — and that can leave dangerous bacteria alive inside the food.
To make sure your food is safely preserved, you must adjust your processing time or pressure based on your elevation/altitude:
- Water Bath Canning (or Steam Canning): Increase the processing time.
- Pressure canning: Increase the pressure (PSI).
I have an article that provides information on that HERE.
This is just a basic reference. For exact instructions, always refer to your canner’s user manual.
Best Practice: Following the elevation/altitude adjustments in tested canning recipes ensures your jars reach the temperature needed to kill harmful microorganisms and create a safe, airtight seal.

Mistake #9: Not Venting the Pressure Canner
Venting a pressure canner is extremely important and ensures that your food heats evenly and reaches the temperature needed for safe preservation.
When you first heat your pressure canner, the inside of it fills with a mix of steam and trapped air. If you skip venting, that air stays inside, and air doesn’t transfer heat as efficiently as steam.
This means that the temperature inside the canner may be lower than your gauge indicates, and your food might not get hot enough to destroy bacteria.
By venting it for 10 minutes before closing the vent and pressurizing the pressure canner, you allow a steady flow of pure steam to fill the chamber. This pushes all the air out, ensuring the correct temperature is reached and maintained for the entire processing time.
Best Practice: Let steam vent for 10 minutes before closing the vent and building pressure inside the canner. This ensures that air is purged and the correct temperature is reached for safe processing.

Mistake #10: Letting Jars Sit in the Canner Too Long After Processing
Letting jars sit in the canner too long after processing can cause both safety and quality problems.
Overcooking the food
The jars stay hot in the residual heat of the canner, which can continue cooking the food inside. This can lead to quality loss, mushy textures, faded colors, and loss of flavor or nutrients. Who wants to eat mushy, tasteless food? No thank you!
Lid Sealing Problems
Extended time in the hot canner can create excess steam between the lid and jar, potentially affecting the vacuum seal. In some cases, the jar lids may seal too slowly or form weak seals. Then you go in to the pantry later on to get something, only to discover the jar had come open in the pantry and the food is ruined.
Stressing the Glass
The jars remain exposed to high temperatures longer than necessary, which can put stress on the glass and increase the risk of cracks or breakage. Jars are an investment, and you want them to be able to last a lifetime. Why not take the best care of them that you can?
Best Practices: After processing, wait the appropriate amount of time, then remove jars. Leaving them too long can cause siphoning or overcooked food. For a hot water bath canner, remove the lid and wait 5 minutes before removing the jars. For a steam canner, turn off the heat and wait 5 minutes then remove the dome and jars. For a pressure canner, remove the lid and wait 10 minutes before removing the jars.

Mistake #11: Improper Cooling Process
Cooling jars after canning is just as important as the processing itself, but it’s a step where many beginners make mistakes that can compromise safety or ruin their food. Here are the most common mistakes:
Jostling or Tilting Jars
When jars come out of the canner, they have not yet sealed. The contents are hot but the vacuum inside the jar hasn’t formed until you hear that beautiful “Ping!” and the jars are completely cool.
I have seen people lift jars out of the canner, and tilt them to the side to pour water off the lids. But the reason this is problematic, is because again, that seal has not yet formed. There can be space between the lid and the jar, and by tilting it you are potentially risking liquids seeping in there, and then the lids not properly sealing.
Any water on top of the jar will most likely evaporate off the top as the hot jars sit there cooling.
Placing jars on a cold or wet surface
Setting hot jars directly on a cold countertop, or other surface can cause thermal shock, which could cause the jars to crack or even burst.
Always insulate the surface with a couple layers of dry kitchen towels, a cooling rack, a wood surface or a canning mat. (See my Video: How to Sew a Canning Mat)
Additionally, you always want your jars to cool in a place that is draft-free (to prevent thermal shock) and where they will not be disturbed. It is also good to avoid direct sunlight if possible.
Not allowing enough cooling time
Removing lids or testing seals too soon can ruin the seal. Jars typically need 12–24 hours to fully cool and set. Moving jars before they’re fully cooled can compromise the seal and shorten shelf life.
Best Practices: Let jars sit upright and undisturbed on a towel or rack, away from drafts or direct sunlight for 12–24 hours.

Mistake #12: Not Checking Seals
Not checking the seals on your jars after canning is another mistake a home canner can make. You just spent all this time and energy making, preparing and processing your home canned goods. Take the time for some quality control checks and make sure it was successful!
A proper seal keeps your food safe, shelf-stable, and free from bacteria. Always test lids after cooling. They should be firm, concave, and unmoving. Checking the seals ensures that your hard work stays safe and delicious for months to come.
If you find that a jar hasn’t sealed, immediately place it in your refrigerator to use right away.
Best Practice: After the jars have cooled for 12–24 hours, press the center of each lid — it should be concave (curved downward) and not move or pop. Then gently remove the ring and lift the jar by the edge of the lid to confirm it’s firmly sealed. I even give it a tug just to make sure.

Mistake #13: Storing Jars with Rings On
Storing home-canned goods with the rings (screw bands) still on the jars might seem convenient, but it’s actually a common mistake that can lead to spoilage, hidden seal failures or rust.
Detect Failed Seals
When the rings are left on, they can hold a loose lid in place, making it look sealed when it’s not. Removing the ring lets you easily spot any jars that have lost their seal.
Prevent Rust and Corrosion
Residue from processing or humidity in storage can cause the rings to rust or stick to the lids, making them difficult to remove later and shortening their lifespan.
Cleaner Storage
Jars without rings stay cleaner and are easier to inspect. Plus, you can reuse the rings right away, and won’t need to purchase anywhere near as many – saving money.
Best practice: Once jars are completely cooled and you’ve checked that each lid is sealed tight, remove the rings. Wash the rings and put them away to use in your next canning session.

Mistake #14: Not Washing Your Filled Jars
Washing your jars after canning, before storing them in the pantry, is an important final step that helps keep your preserved foods safe, clean, and long-lasting.
It removes sticky residue. During processing, some juices or syrup can siphon from the jars, sometimes even if they are properly sealed. This residue can leave your jars sticky, attracting dust, pests, or even mold while in storage. Gross!
This is a lesson I learned the hard way back when I was a brand new canner, many, many years ago.
Food residue left on the lids and bands can cause rusting or unpleasant smells over time, especially if you live in a humid climate, like I do in the South.
Washing the jars keeps your pantry tidy!
Best Practice: Once the jars have fully cooled and sealed, remove the rings. Wash the jars in warm, soapy water, rinse well, and dry them thoroughly before labeling and storing.

And Finally… Mistake #15: Skipping Labeling
Never skip labeling your home-canned foods! A simple label with the contents and date helps you stay organized, rotate your stock, and avoid confusion or spoilage. It’s an easy step that keeps your pantry safe, efficient, and beautiful.
Skipping labeling might seem harmless, but in home canning it’s a big mistake that can lead to confusion, waste, and even safety issues.
Know What’s Inside
So many canned goods can look alike once they are on your pantry shelf. Is it apple butter or barbecue sauce? Who can tell!?
Track the Date
Proper labeling with the date of canning helps you rotate your stock and use the oldest jars first. This ensures you’re eating your preserved foods while they’re still at their best quality and you don’t find jars that were missed and are wasted.
It is recommended that home-canned foods are best used within a year of canning. After that, they begin losing flavor, color and texture. Their safety can also begin to come into question.
Identify Recipes or Variations
If you make different versions (like spicy pickles vs. dill), labels help you remember which batch is which.
Best practice: Write the contents and date (and recipe or batch if needed) on the lid or label before storing your jars. A simple piece of masking tape makes a great and inexpensive label. You can also write directly on the lids with a permanent marker if you like.

Canning is both an art and a science, and every detail matters when it comes to safety and success.
It doesn’t have to be scary.
But by understanding and avoiding all these common mistakes, you’ll protect your hard work and preserve your harvest with confidence.
Now you have the knowledge to fill your pantry with wholesome and nourishing foods that you can truly trust, and feed your family with joy.

I enjoy your videos. The laidback, easygoing invitation to join your daily work or activities. Thank you for sharing.
Thank you!